This is the first part in my intro to hacking series. It takes you through the creation of your first texture. I'll try to get part 2 up soon.
An Intro To Hacking (Part 1)Needed- Photoshop (This tutorial will be written for Photoshop 7.0 but it should work with most programs)
- ASH
- ntcompress and texconv. These can be found in the Revolution SDK which I cannot provide a link to.
- Character .pacs
- Basic Photoshop Knowledge (Mainly what the polygonal lasso is)
- (Optional) Visual ASH
ASH and the character .pacs can be downloaded from
The Download Everything Thread.Instructions(Click thumbnail for full picture)
Step 1: Place ASH in its own folder somewhere on your computer. Unzip FitMetaKnight00.pac into the same folder. Place ntcompress and texconv also in the ASH folder.
 Step 2:
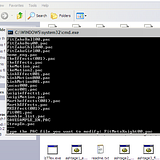
 Whether through VASH or manually, run step1_extract.bat. When it prompts you, type in the name of the .pac you want extract. In this case, FitMetaKnight00.pac.
 Step 3:
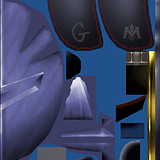
 Once ASH closes, open up your chosen image editing program (in my case Photoshop) and navigate to 03metaknight_body within the ASH folder and open the .tga it contains.
 Step 4:
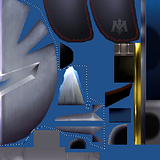
 What you see displayed in front of you are the textures for MK's gloves, mask, shoulder pads, and body.
 Step 5:
 Select the polygonal lasso tool and draw a rough outline around the main mask texture as well as the other stuff I've selected (observe picture).
 Step 6:
 Go to Image>Adjustments>Hue/Saturation.
 Step 7:
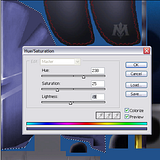
 Check the colorize box in the lower right of the Hue/Saturation Window and drag around the Hue, Lightness, and Saturation sliders until you find a color you like. In my case I went with a nice blue.
 Step 8:
 If you feel the need, do other stuff with the texture (draw on it, add text, etc.). In my example, I added a G to the shoulder pads and some lines to the mask and reduced the Opacity. (Opacity and Blending styles won't be covered in depth here.)
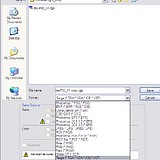
 Step 9:
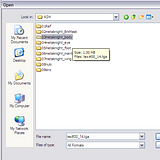
 File>Save As. Navigate to 03metaknight_body in the ASH folder, make sure Targa is selected as the File Format and double click the original file (tex#00_14.pac in this case). When it asks you if you want to overwrite, click yes. When it asks you the Targa Options, be sure to choose 32 Bits/Pixel.
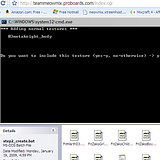
 Step 10:
 Run step2_create.bat in the ASH folder. Type "y" for the textures you edited (in this case 03metaknight_body) and type anything else for textures you didn't edit.
 Step 11:
 Wait for ASH to finish and move the resulting _new.pac and _new.pcs files somewhere else. Rename them to FitMetaKnight##.pac and FitMetaKnight##.pcs. Replace the ## with the number of the costume you want to replace. The list of costumes can be found
here.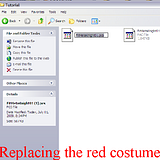 Step 12: Observe my Dynamic SD Loader guide for info on how to get it into your game.
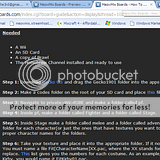

Tips:
- There must only be one file (the tga) in each ASH folder.
- Use the Character Page at the Dojo for refreshers on what the character looks like.
- Don't use fully saturated colors! (255, 0, 0, or 0,255,0, or 0, 0, 255) it'll make all our eyes burn! Even with black or white, use a dark or light grey instead. It'll improve your textures immensely.
Next up: Indexing and other advanced character texture stuff!
Questions? Comments? Stuff to add to the tips? Post here!


