|
|
 |
« on: June 06, 2010, 05:59:57 PM » |
|
Tools Needed:
> Character .Pac files
> Brawlbox
> Image editing softwareAlmost all .Pac files: http://www.smashboards.com/showthread.php?t=230551Brawlbox: http://www.mediafire.com/?tzlzyyn0a3kI have tried to be as thorough as possible with is guide, so at points it will seem condesendingOk, to start off we will need to choose which character we will be editing, so open Brawlbox and go to file > open and select the Fit[Character]0X.pac of the character of your choice, I‘ll be using FitLuigi00.pac for this example. (A quicker way of doing this is setting the .pac files to open with brawl box by using right click > properties on the file itself.)
Now we have this:

Click on the small cross next to the tab which says “TextureData” and continue to expand until you can see a set files with a green symbol next to them saying TEX0 on them. You will find that most of these files are named Fit[Character]body or something along those lines.

By clicking on each one, you should be see a preview of each of the images next to them. Now, with most of these you can roughly tell which part of the texture the file is linked to, but some are a little trickier.
Right click on the texture file you want to edit and select export, then save it to somewhere you will remember.

Now you can minimize Brawlbox and open up your image editing program. (I use Jasc Paintshop Pro 
Open up the texture file, and edit away.
To make it obvious what I’m editing, I’ll draw a red X over Luigi’s cap)

Once you are done, save your file as a PNG and maximise Brawlbox again.

Right click on the same file you exported earlier, and select replace, then go ahead and find the texture you have edited. A preview window should appear once you have selected and okayed it.

Once you have the preview window up, you will see a bunch of options down the right hand side concerning format and palette details… DO NOT CHANGE THESE.
Changing those details will more than likely screw up what the texture looks like in game, so just click Okay.


Now we are back at the main Brawlbox window… But what if you want to see what it looks like, before playing it in game?
Above the “TextureData” you should see a tab entitled “ModelData,” click on the small cross next to the tab as you did before and continue to do so until you see a grey icon with MDL0 written on it.
By right clicking on this, you will be given the option ‘preview,’ so go ahead and click on it.

You should get this:

Now if you scroll down with your mouse, you will be able to see a model of the character you are working with, and of course, your edited texture. 

(in this preview window you can use scroll to zoom, right click and drag to pan, Ctrl and pan to rotate)
If you are unhappy with what your edit looks like, you can minimize Brawlbox and return to your image editing program for further adjustments. You will not need to export the texture every time you want to edit it, you only need to replace it again.
You can repeat all of the above steps for every part of the texture you want to edit, until you are happy with what your new texture looks like.
Once you are happy with what it looks like, you can go to file > Save as and save your our work.
You will need to save your work as a .PCS file and, to be safe, a .PAC file as well.
To make it easier to find your edited in future, name the file something you will remember, as apposed to something like FitLuigi00.pcs. (I name my textures like so: FitLuigi0#redX.pcs)

So now that you have made your texture, you want to see what it looks like in game, right?
Well then, open up your SD card and put the .PAC and .PCS files into:
Private/wii/APP/RSBE/pf/fighter/[character]

Now before you can see your texture in game you will need to replace one of the existing textures.
This is easily done by renaming your .PAC and .PCS to match the old texture.

Here is a list of what to rename your files:Captain Falcon
00-Original
01-Blood Hawk
02-Green
03-Blue
04-Black
05-Pink
Dedede
00-Original
02-Green
03-White
04-Grayscale
05-Purple
06-Pink
Diddy Kong
00-Original
02-Green
03-Blue
04-Pink
05-Yellow
06-Purple
Donkey Kong
00-Original
01-Red
02-Green
03-Blue
04-Black
05-White
Falco
00-Original
01-Red
02-Green
03-Blue
04-Black
05-Yellow
Fox
00-Original
01-Red
02-Green
03-Blue
04-Black
05-White
Ganondorf
00-Original
01-Red
02-Green
03-Blue
04-Grandpa Ganon
05-Brown
Ike
00-Original
01-Red
02-Green
03-Blue
04-Another Kind Of Green
05-Yellow
Kirby
00-Original
01-Red
02-Green
03-Blue
04-Yellow
05-White
Bowser
00-Original
01-Red
03-Blue
04-Black
05-Pimp Gold
06-Brown
Link
00-Original
01-Red
03-Blue
04-Dark
05-White/Light Blue
06-Yellow
Lucario
00-Original
01-Red
02-Green
04-Light Blue
05-White
Lucas
00-Original
01-Red
02-Green
03-Blue
04-Claus
05-Pink/Purple
Luigi
00-Original
01-Red
02-UNUSED-Blue
03-Blue
04-Fire Luigi
05-Orange
06-Waluigi
Mario
00-Original
02-Green
03-Jumpman
04-Wario
05-Black
06-Fire Mario
Marth
00-Original
01-Red
02-Green
03-Blue
04-Black
05-White
Meta-Knight
00-Original
01-Red
02-Green
03-Blue
04-White
05-Pink
Ness
00-Original
02-Green
03-Blue
04-Bumble-Bee
05-Fuel
06-Mr.Saturn
Peach
00-Original
01-Red
02-Green
03-Blue
04-White
05-Daisy/Yellow
Pikachu
00-Original
01-Cap
02-Bandana
03-Googles
Olimar
00-Original
01-Red
02-Green
03-Blue
04-White
05-Dirty Helmet (Yellow and Black)
Pit
00-Original
01-Red
02-Green
03-Blue
04-Gold
05-Black
Pokemon Trainer
00-Original
01-Red
02-Green
03-Blue
04-Light
Ice Climbers
00-Original
01-Red
02-Green
03-Blue
04-Dark
05-Light
Jigglypuff
00-Normal
01-Flower
02-Sleep Hat
03-Japan Hat
04-Trainer Cap
ROB
00-Original
02-Green
03-Blue
04-Pink/Purple
05-Yellow
06-NES
Samus
00-Original
01-Pink
02-Green
03-Fusion/Blue
04-Gravity Suit/Purple
05-Dark Suit/Black
Zelda
00-Original
01-Red
02-Green
03-Blue
04-Black
05-Ocarina of Time colors
Snake
00-Original
01-Red/Black
02-Green
03-Blue
04-"IDK WTF this is" camo
05-Wild Feline camo
Sonic
00-Original
01-Red
02-Green
04-Gold
05-Black
Toon Link
00-Original
01-Red
03-Blue
04-Purple
05-NES Link
06-Dark
Wario
00-Original (WarioWare)
01-Red (WarioWare)
02-Green (WarioWare)
03-Blue (WarioWare)
04-Black & Red (WarioWare)
05-Orange & Blue (WarioWare)
06-Original (Overall)
07-Red (Overall)
08-Green (Overall)
09-Blue (Overall)
10-WarioLand 2 color (Overall)
11-WarioLand 3 color (Overall)
Wolf
00-Original
01-Red
02-Green
03-Blue
04-Black
05-Red & White
Yoshi
00-Original
01-Red
03-Blue
04-Yellow
05-Pink
06-Light Blue
Congratulations! You have just made your first texture hack!

Notes:
- Some characters have multiple “TextureData” tabs. These are normally used for the characters accessories, such as Peach’s parasol.
- In some cases, you will need to rename or add a number to the texture you export or else they may not be viewable in you image editing program (Pikachu’s eyes do this for me)
- Some textures can be made transparent or partially transparent (Zelda‘s Dress for example). To do this, when saving your edited texture, you must optimise it before saving. This differs from program to program so you will have to find out how to do this for yourself, sorry.
- The following all require both .PAC and .PCS files: Zelda/Shiek, Samus/Zerosuit, Wario/Warioman, Bowser/GigaBowser and all the Pokemon Trainer’s Pokemon.
Tips:
-When first starting texture hacking, it is best to do simple recolours or texture swapping, this is much easier than trying to make a full texture straight of the bat.
- Block colour looks ugly, try to use it as little as possible.
- Sometimes it can be hard to tell which part of a texture is which. I suggest putting a bright or contrasting colour over areas you are unsure of and then look for them on the model after.
- Making nude texture hacks will get lots of downloads, regardless of how good or bad they are 
|
|
|
|
« Last Edit: June 06, 2010, 06:29:52 PM by DrPanda »
|
 Logged
|
|
|
|
|
|
|
|
« Reply #1 on: June 07, 2010, 09:32:19 PM » |
|
Thank you so much. I appreciate it.
|
|
|
|
|
Logged
|
|
|
|
|
|
|
|
« Reply #2 on: June 10, 2010, 10:07:50 PM » |
|
i wish i had this when i was a nub
|
|
|
|
|
Logged
|
|
|
|
|
|
|
|
« Reply #3 on: June 18, 2010, 04:53:26 PM » |
|
(Making nude texture hacks will get lots of downloads, regardless of how good or bad they are ) <--------- lol xD any way thnx i only now start make texture now thnx for amazing tutorial |
|
|
|
|
Logged
|
|
|
|
|
|
|
|
« Reply #4 on: June 21, 2010, 09:36:44 AM » |
|
how to i make things transparent?
|
|
|
|
|
Logged
|
 i like tea with my Pawnage  [/u [/u |
|
|
|
|
|
|
« Reply #5 on: June 21, 2010, 12:25:43 PM » |
|
how to i make things transparent?
Make sure you have a transparent layer as the base then just select the area you want and erase it. When you save it you must optimise it or else the erased area will show up white, but I can't help you on how to do that as it differs from program to program. |
|
|
|
|
Logged
|
|
|
|
|
|
|
|
« Reply #6 on: June 21, 2010, 01:57:51 PM » |
|
s. what program to us ? cause i have pain on windows vista and corol something cause i wana make peach bottem layer transparent and its kinda hardd please helppp
|
|
|
|
|
Logged
|
i like tea with my Pawnage [/u |
|
|
|
|
|
|
« Reply #7 on: June 21, 2010, 03:55:42 PM » |
|
I use Jasc paint shop pro 8... I kinda didn't understand the rest of that post but you will need a program that can use layers (i.e not Paint)
Am I right in reading you have Corel, because you can use layers in that.
|
|
|
|
|
Logged
|
|
|
|
|
|
|
|
|
|
« Reply #9 on: June 25, 2010, 09:42:53 PM » |
|
When I preview the model it doesn't show the texture just this: 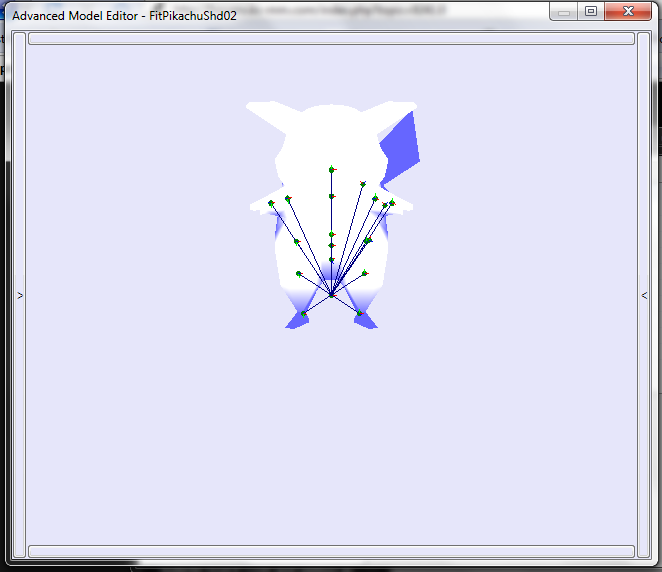 Even if I do nothing to the texture. |
|
|
|
|
Logged
|
|
|
|
|
|
|
|
« Reply #10 on: June 25, 2010, 10:12:12 PM » |
|
You're viewing the shadow |
|
|
|
|
Logged
|
|
|
|
|
|
|
|
« Reply #11 on: June 28, 2010, 08:40:35 PM » |
|
Thanks a lot!  |
|
|
|
|
Logged
|
|
|
|
|
|
|
|
« Reply #12 on: July 02, 2010, 04:17:31 PM » |
|
Is it possible to HDify textures? A pikachu skin I'm working on looks great save for the main body parts such as the head, belly, parts of the back, the arms and hands, and the feet, which look like crap due to low resolution on the texture file. See for yourself what I mean: The idea is to have for Pikachu to have fur, like a rodent should! I'll rephrase my original question! My question would be to enlarge the texture from say 256 X 256 to lets say 1024 X 1024? Some values seem to be editable in BrawlBox but I'm not sure it'll cause it to register a larger texture, let alone, have it weighed correctly on the model. |
|
|
|
|
Logged
|
|
|
|
|
|
|
|
« Reply #13 on: July 02, 2010, 07:07:22 PM » |
|
I don't think you can do that. Even if you could the texture would look any different as it would still take the same area and stretch it over. I tried to do that with Pikachu aswell and I discovered that what you have now is the best you are gonna get it. The only way to really improve it is to shrink fur texture to fit the part which stretches across the body (I hope that made sense  ) |
|
|
|
|
Logged
|
|
|
|
|
|
|
|
« Reply #14 on: July 02, 2010, 07:40:37 PM » |
|
Oh well! It doesn't look as bad ingame as it does in brawl
box.
But how Nintendo weighed the body texture is unusual and lazy for Pikachu. Why make the majority of the body in the smallest area while the ears and tail textures are the largest with some areas completely unused? What were they thinking?!
You don't need to answer that!
But thanks for the reply!
|
|
|
|
|
Logged
|
|
|
|
|
|


